Tues Jan 30 - Class 3
- Homework Overview
- Principles of Motion Design
- Design Boards
- Dynamic Motion Exercise and Workflow Demonstration
- Basic Motion Principles via Transformation Properties
- Paper Modeling and Storyboarding
- Software Demonstration and Work Time
- Exporting Demonstration and Work Time
- Exercise Video Submission
- Assignment:
- 388: Dynamic Motion Animation
- 488: Visual Countdown Update
- Reading:
- Tutorial:
- After Effects CC2017 Ess Train: Motion Graphics (Demaflies) Intro & Chp. 1
- Announcements:
- MLK Commemorative Event: Keynote Dr. Floyd Rose, Wed Jan 31 3:30-5pm Hamilton Room UC
- Time Wasters:
- 12 Principles of Animation interpreted by Mustard Creative Agency
Homework and Tutorial Notes
- After Effects Introduction
- The Basics & This Week's Assignment
- Chapter 1: Working With Shape Layers
- Related to working with vector graphics in Illustrator
- Scale and Resolution Independent
- Working with shapes is similar to creating masks
- Shape Layers are editable and have properties that can be keyframed
- Add: Repeater & Repetition in design
- Pen Tool for shapes, Stroke, etc

Principles of Motion Design
- Timing, Spacing, & Rhythm
- Easing
- Mass & Weight
- Anticipation
- Arcs
- Squash, Stretch, & Smear
- Follow Through & Overlapping Action
- Exaggeration
- Secondary Action or Layered Animation
- Appeal
Design Boards
This semester, we will begin the majority of work by generating "Design Boards". Consider them as a cross between storyboards and mood boards with an emphasis on the "design" of a project. An image search for design boards and motion design returns some useful examples. Essentially, design boards help visualize what a project will look like and how it will work visually. These things send is in a visual design direction where we can begin generating assets. As a stage of "pre-production", it gives a good point to begin from. Animation and motion design are then related to making these carefully considered compositions move in time. For design boards, consider things like typeface, shape, color, graphic style, sequence, visual composition, audience, and transitions.
Dynamic Motion Animation and Demonstrations
For the majority of the class session, you will work in small groups or independently. Our goal will be to begin this short assignment and carry it all the way through to completion by the end of the week. That is very ambitious considering that this will be your first opportunity this semester to use After Effects. Our focus will be on workflow:
sketching -> design boards -> building assets -> animating -> rendering
With our exercises today, some aspect of the workflow will be more important that others. And because we are really only getting our feet wet with the software it is expected that there will be questions. The guidelines below will outline the expectations for what is included in our Dynamic Motion Animation Assignment. Following that, there will be a loose list of process stages. During class there will be demonstrations to help clarify how to approach each stage of the exercise, but to save space, a lot of that will not be included here on the website. We will practice and develop these processes regularly throughout the semester, so if you do not get all of it today there will be time to catch up as we go.
Dynamic Motion Animation Requirements:
- Shapes: Rectangle, Ellipse, Triangle
- Color: minimum of 3 colors
- Sequence: (choose one or two) Unity/Balance/Hierarchy/Scale/Dominance/Contrast
- Transformations:
- Scale - one or more changes in size
- Position - one or more movements within compositional space
- Opacity - one or more transparency changes
- Rotation - one or more changes in rotation
- Duration: 10-20 seconds
- Include title with squence topic for appx 2 seconds
Dynamic Motion Animation Process:
Team or small group concept development with Physical Objects/Paper & Individual Animation Development with Software Tools
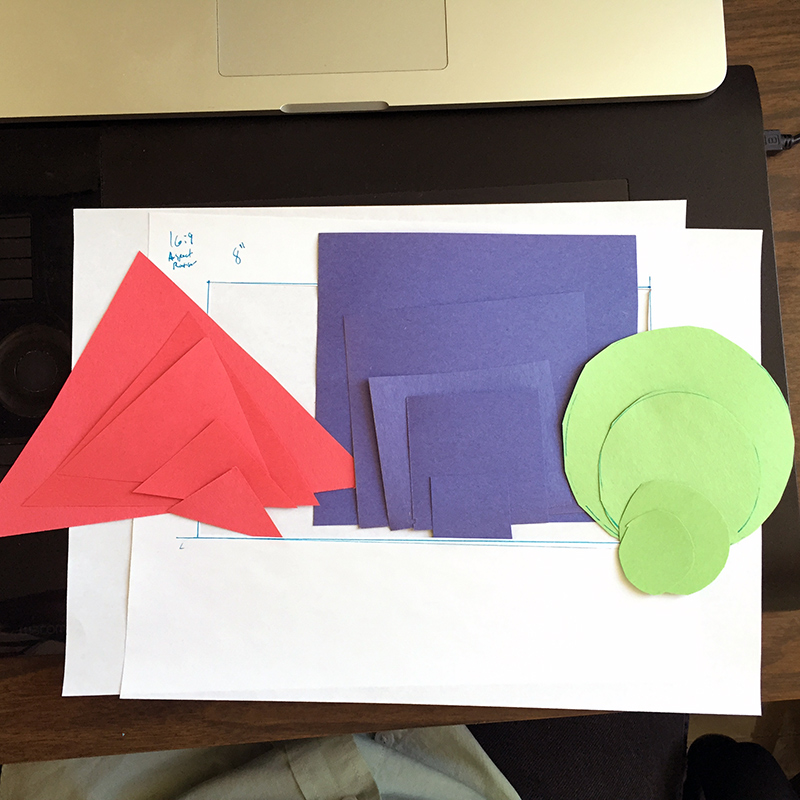
1. Individually or in small groups, make a video frame/window and cut/tear shapes out of provided colored paper. These will serve as the visual elements you move within the composition. You could begin this by printing out a blank storyboard page and cutting out the central area.
Video frames come in one or two different aspect ratios. We will be focusing on High Definition (HD) this semester. Your frame should be in the 16:9 aspect ratio. This means an 8" x 4.5" frame could be cut from a letter sized piece of paper.
2. Transform cut paper inside of the video frame/window to experiment with how the objects will be animated. Consider the transformation requirements like rotation, scale, and position. These properties will be animated to demonstrate a principle of design. Be creative - there isn't one specific way to address the requirements.

3. Create design board sketches, document the animation sequence you are planning with drawing and text notes. The design board could also be made digitally in Photoshop or Illustrator and they will help you to continue visualizing how you will animate your content. The better your notes are the more useful they will be later. It is likely that you will make design boards as you move the physical cut paper objects (steps 2 & 3 at the same time). You may also make corrections or change the sequence at any time!
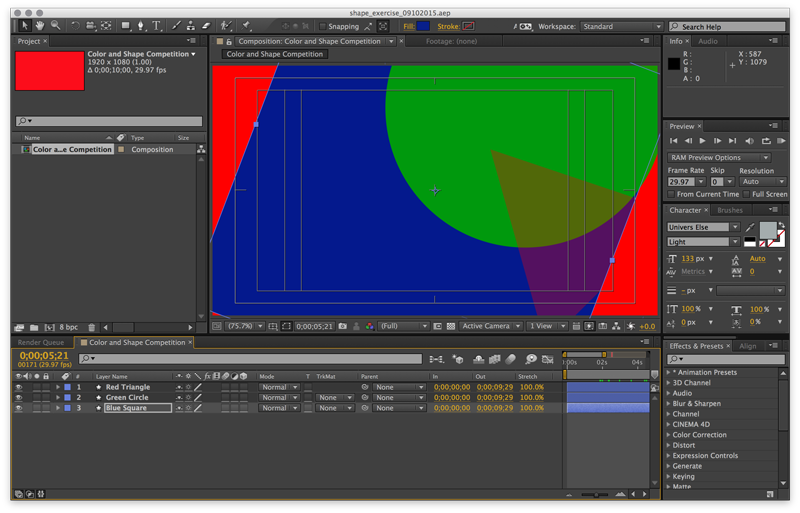
4. As we begin to animate, everyone should work independently. Using your physical model and storyboard sketches for reference, you will build an AE Project. This portion of the exercise will include a generic walk through demonstration. You've already visualized what will happen in your animated sequence, and now you will work to translate that into a digital version.
5. As you develop your animated sequence, it is likely that you will want to edit the timing of your work based on how it looks when you preview it. Once you can see how the elements move within your timeline you will work to modify and refine durations of animated movements to improve the aesthetic qualities and pace of the sequence.
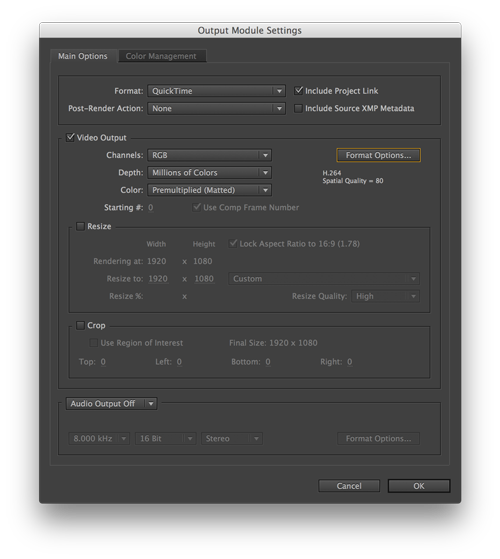
6. Later, you will render a video from your project. This portion of the exercise will include a generic walk through demonstration. The output settings menu should look similar to the one above, and your filename should follow the naming convention:
"lastname_dynamicmotion.mov"
Send your composition to the render queue, check the output module and save location, and then render your animation.
7. Any animations that are completed will go through a second round of development during our next class session. Any submitted videos will be collected via D2L. If you've finished more quickly, consider refining your animation or try building an alternate version in a different composition within your project. We will be looking for one animated video per student, but you care encouraged to do more than one and experiment.