Schedule:
- Reading Discussion/Presentation
- Principles of Design:
- Unity
- Work Session and Demo: Project 1
Assignments:
Announcements:
- Hallway Exhibition: Diverse Perspectives
- Next Week: COaC Sponsored Diversity Forum: pARTicipate! - Oct 16-20
Time Wasters:
Reading Discussion & Presentation
We will start with an introduction to our Discussion Forum. Regularly on Tuesdays we will take some time at the beginning of class to talk about our reading for the week. Our assignments will now come from the text "The Language of New Media" by Lev Manovich.
Principles of Design
Unity
Unity - is the relationship among the elements of a visual design that helps all the elements function together. Unity gives a sense of oneness to a visual image as the different parts work together to create meaning.
When working with vector graphics, how might one demonstrate unity? Unity can be created a number of different ways. Because it refers to how the various parts of a design or visual composition work together, artists and designers create a sense of a unity through different techniques. Sometimes unity could be achieved through color, shape, space/perspective, or other elements of design. In order to understand unity, it is a good idea to look at examples of artwork you might be interested in and thinking about what is working or what isn't. Think about why the design/artist might have made those decisions and how it effects the look and feel of the work.
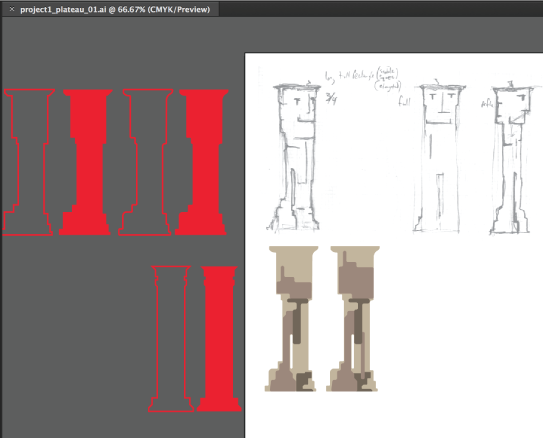
Project 1 Demonstration and Work Session
This demo will be a very basic overview of workflow for the project. It can be repeated or adjusted as needed depending on your project.
Sketch -> Trace -> Version -> Refine and Edit -> Finalize and Layout Presentation
- Clear sketches are helpful
- Choose from thumbnails and then redraw and clean up your work
- Work General To Specific
- Point-By-Point, Shape Build, Brush & Shape
- Simple Colors First
- Save Regularly
- Duplicate Layers/Groups/Etc As Much As Possible
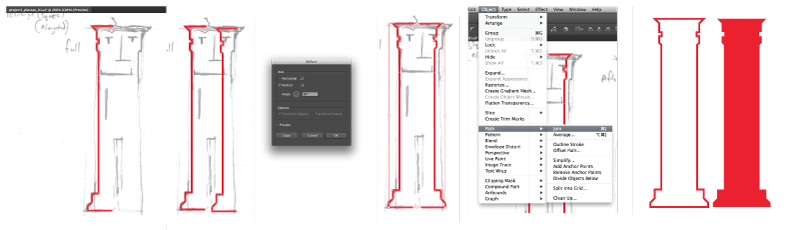
- Symmetry by repeating a path, symmetry can help develop character proportions and unify a design
- Trace with Pen Tool one half of shape
- Copy/Paste that path
- Object -> Transform -> Reflect
- Align as needed
- Direct Select anchor points to be joined
- Object -> Path -> Join
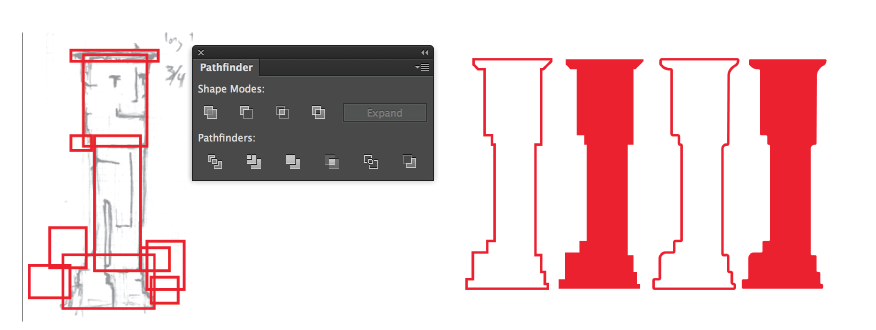
- Use shapes to get generalized or basic form: either point-by-point or shape build
- Pathfinder - Unite and Minus Front (or others as needed)
- Direct Select on corner anchor points - 'rounded corners' handle
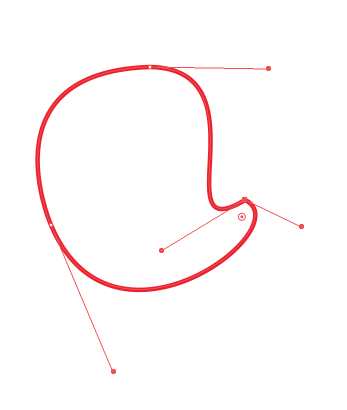
- Convert anchor points
- On anchor eliminates one or more bezier curve handles
- On bezier curve handle allows angle corner with curves
- Direct Select a shape give Smart Curve options
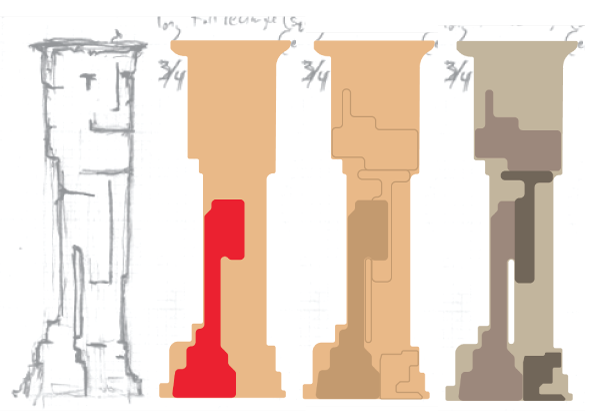
- However you choose to build, work in layers
- Start with base, silhouette, or positive space first - this is a "fill"
- Details like contour line, color, or texture should be built on top
- This could still be considered a sketching stage, experiment in sketching
- Make alternate versions by duplicating
- Add Layers, Subtract Layers, Reshape Paths in duplicated layers
Project 1 Work Session
During the work session today, the professor will work to give each student some feedback on what they are doing. With the feedback you receive, you should continue to build or modify your sketches. Use your studio work time today to move between physical and digital sketching. It is likely that you will build your character multiple times - working with vector graphics to illustrate a concept can also be a lot like sketching in your sketchbook. Remember: you can always copy work into a new work file if you need to isolate and refine something or to move forward after making design decisions for the project.
In today's work session, we will attempt to get as much work done as possible. During the next class session, there will be time to work as well. There will be a demonstration related to finalizing and formatting your work by the end of Class 11. The calendar will be adjusted with our critique and discussion of final project work to be done in Class 12.