Schedule:
- Drawing Exercise: Expression Grid
- Drawing Exercise: Graphic BGs
- Vector Illustration Methods Review
- Output Methods: Exporting and Printing
Assignments:
- Reading: “Vocabulary of Comics”, Scott McCloud
- Practice Drawing & Review Illustrator
Announcements:
- Convocation - College of Arts and Communication: Thurs Sept 21 4pm Light Recital Hall
- Maker Faire Milwaukee: Sept 23-24, Wisconsin State Fair Park
Time Wasters:
Drawing Exercise: Expression Grid
In illustration and character development practices, a common exercise is to explore drawing facial expressions. There are number of ways that the exercise can be done, but the main concept is to sketch small thumbnails quickly with very minimal details (like eyes, nose, mouth) in a way that is expressive of specific emotions. Below is a sample of the grid we will use for our sketches today. You will have a time limit and should try to draw each expression for each of our basic character shapes. Draw only the main facial details in each shape. A reference example for this sort of exercise can be found here.
- Features: Eyes/Eyebrows, Nose, Mouth
- Facial Shapes: Circle, Square, Triangle
- Emotions: Sleepy, Bored, Shocked, Excited, Amused, Furious, Scared, Sad
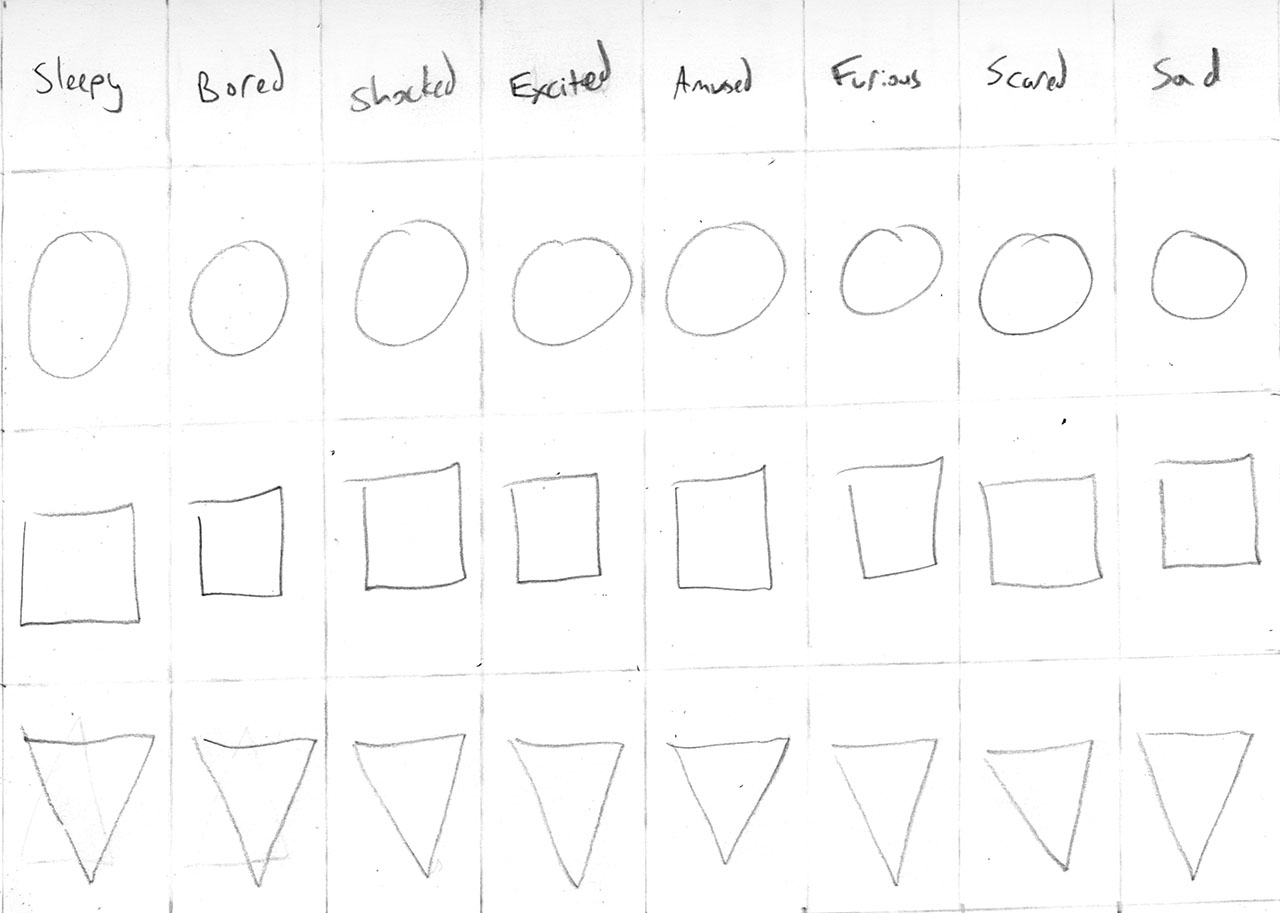
The exercise will last for about 30 minutes. Once the drawing time has passed, we will take some time for you to share your drawings with a small group of students close to you. Compare your work, talk about which sketches express the emotions most effectively.
Drawing Exercise: Graphic BG: Bullseye & Starburst
As a change of pace for drawing, the following brief demonstration will be geared towards some common background graphic techniques. You may recognize them from things you have seen online or in advertisements: bullseye and starburst.
Bullseye


A bullseye graphic can be made quite easily by duplicating a circle and decreasing or increasing its size. In order to keep the shapes centered, it is useful to use "Paste In Place" rather than a simple paste operation. Then, holding Shift and Option, you can scale something from the center. Alternating colors makes the bullseye effect appear. Consider alternate ways of using color for bullseye, including transparency or blending modes.
Starburst


A starburst graphic is a little more complex to create. It also commonly used as a background (sometimes even overused). A starburst begins as a cirlce that has been given a "Dashed Line" stroke. Then, through the Object menu, the path is expanded for both Fill and Stroke. This turns the dashed line into a series of closed paths. Select only the inner anchor points, and then Control + Click 'Average' and check 'Both'. This will extend the inner points into the center of the circle. A further step would be to use a "Clipping Mask" to cut the starburst to the size of your document. Consider alternate ways of using color for starburst, including transparency or blending modes.


Review: Vector Illustration Methods
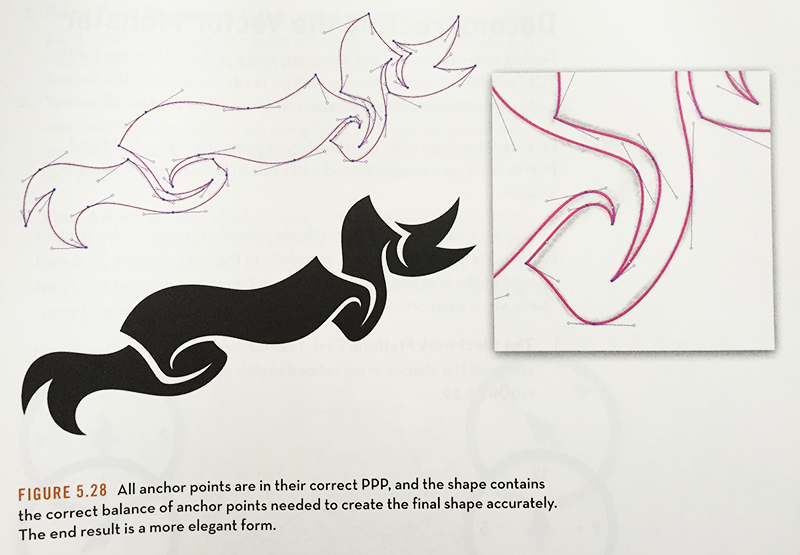
Point By Point Method
- Pen Tool
- Place Anchor Points: One By One
- Straight Lines and Bezier Curves
- Prime Point Placement: Best Location for Anchors & Curves
- Systematic Approach
- Custom and Unique Line Quality and Shape
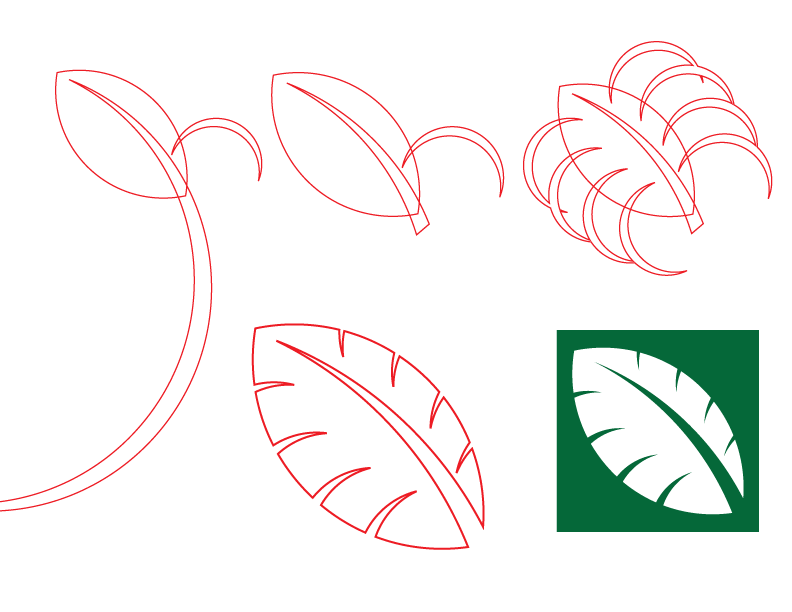
Shape Build Method
- Shape Tools (ellipse, rectangle, polygon)
- Simplified Form from Geometric Shapes
- Construct Complex Shapes from Simple One
- Pathfinder Tool: Combine or Edit Shapes from One Another
- Systematic Approach with Multiple Steps
- Stylized or Simplified Appearance
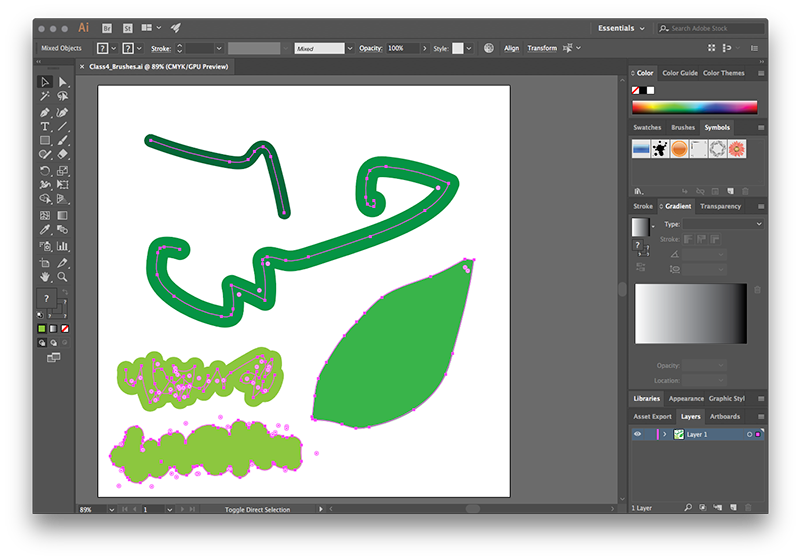
Brush and Shape Method
- Brush Tool
- Recommended Use with Wacom Tablet (Mouse Also Works)
- Draw, Paint, Trace Freehand
- Modify After Creating Paths
- Expand
- Outline Stroke
- Swap Stroke and Fill
- Unite
- Join
- Systematic Approach with Multiple Steps
- Hand-drawn/painted Appearance
Output Methods
With the remaining time in class, there will be a brief overview of output methods that will be required in class. The demonstration will be relatively short and will be repeated during future class sessions. There are two primary ways that your work will be formatted for submission. All work that is turned in will require a websafe PNG. Projects will be printed and submitted as PDF in addition.
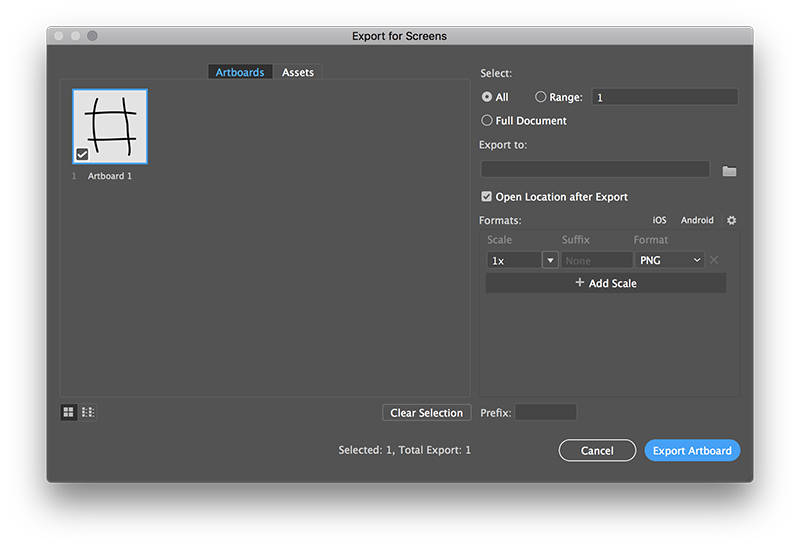
Export For Screens (Websafe)
- File -> Export For Screens
- Artboard Checked
- Export To
- PNG
- Export Artboard
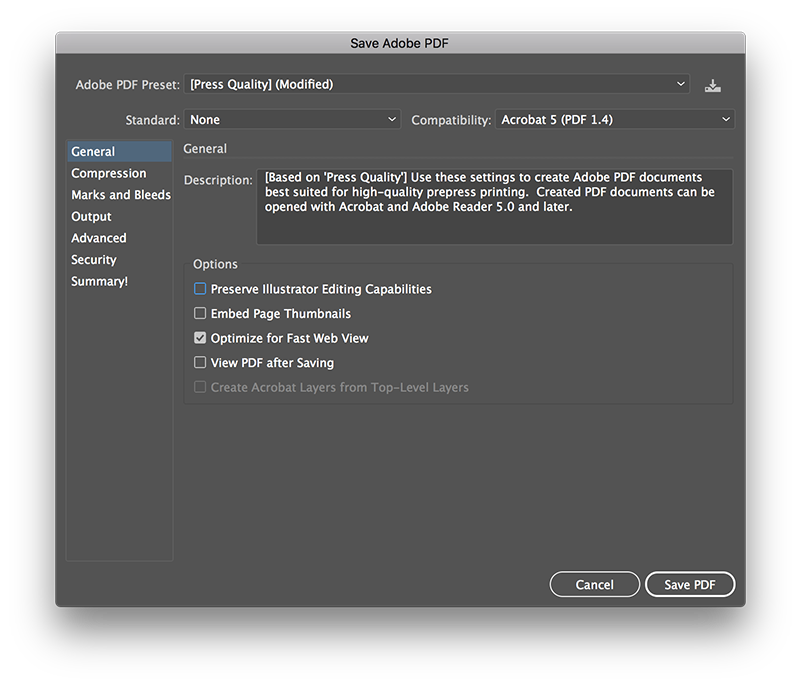
Export PDF (Print)
- File -> Save As
- Format PDF
- Adobe PDF Preset: High Quality Print
- Uncheck Preserve Illustrator Editing Capabilities
- Save PDF